
Once a contract is built within the FrontRunner system, customizing it for each record takes minutes with minimal effort. Our one-write technology saves you time and allows you to quickly generate and print professional documents to present to your families.
Contract Categories
System Settings > Contract Management > Contract Categories.
Category and sub-category names can be edited. Note: This section refers to categories not products.
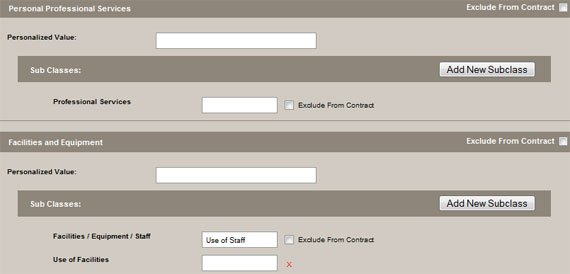
Personal Professional Services
- Enter a new name in the Personalized Value field. (ex. Funeral Home Charges)
- Check Exclude From Contract if this category should not be included on the contract.
Professional Services – Edit the sub class by entering a new name. Note: At least one sub class must be entered. Select the Add New Subclass button at the top right of the first category.
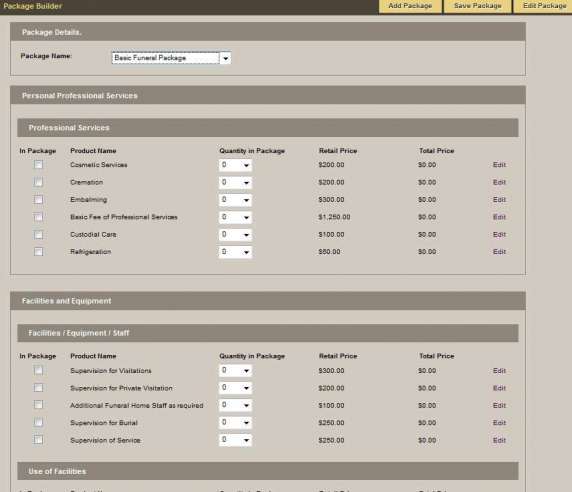
Edit the second section – Facilities and Equipment. Refer to the graphic above as an example:
- Left the section called Facilities and Equipment.
- Renamed the Facilities/Equipment/Staff sub class to Use of Staff.
- Added a new sub class called Use of Facilities.
Continue working through all of the sections until complete. Save.
Contract Verbiage
System Settings > Contract Management > Contract Verbiage.
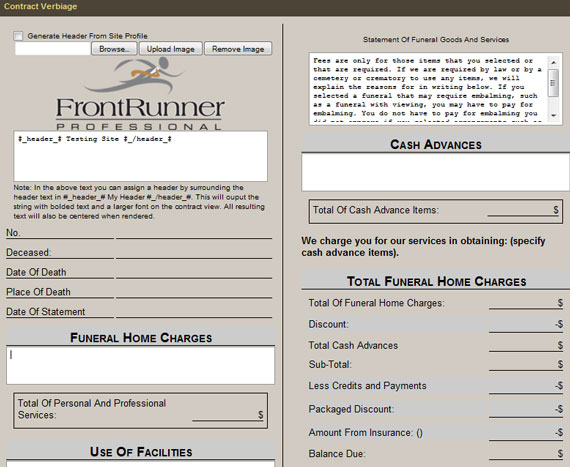
Contracts come with pre-written legal verbiage. To edit the content to fit your firm’s specifications, modify the sentences directly in the boxes provided. Within each section, add a description underneath each category heading.
To upload your funeral home logo to the contract: Select the Browse button. Locate the file and select the Upload Image button. If there is no logo, check the box to Generate Header From Site Profile; the contract will pull information from your location profile.
The section underneath the logo (see below) contains: #_header_# Your Funeral Home Name #_/header_#. This allows you to customize the header of the contract so the information doesn’t pull from the location profile. Add any additional information under the funeral home name. Save.
Taxes & Misc.
System Settings > Contract Management > Taxes & Misc.
Whenever a package is selected, specify how the taxes will be applied.
- Don’t apply any taxes
- Apply to items individually
- Apply to package price
Add the annual (%) late charge (optional).
- Check the Exclude Packages from Contract View box if packages are not used.
![]()
- Check the Show Package Discount on Contract box if applicable.
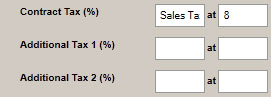
- Enter up to 3 different taxes applied to contracts. Each tax can be applied to all or individual categories.
- Select where to apply each tax. In this example, the Contract Tax (Sales Tax – 8%) will only be applied to the merchandise. Check the Merchandise box.

All sub categories created under a category will display to allow for specific items to be selected. When complete, Save.
Add Products
Make sure all of your products and services are added to the product database.
Price List
The Price List displays all products added to your product database. System Settings > Catalogs > Price List.
Navigate to the category to add to the price list and click on the +. All product and services contained within the category will display.

Check the In GPL box to add as a selectable item for your contracts. When a product is added, the background color changes from pink to green.
All product text information is editable. Select Edit:
- Name
- Description
- Short Description
- Price
- Has Quantity – Check this box to signify that the product is available to add to a contract.
- Max Quantity – If the product can have a quantity greater than one, then enter the maximum quantity. (ex. you would most likely only allow one casket per contract but multiples for keepsake items).
- Classification
- Priority – Enter how the product should appear (the order) on the GPL.
- Show Desc. on Contract
- Always Show on Contract – Check to display the product on the contract, whether it is chosen or not. If it is not chosen, a N/A would be visible instead of a price.
- When complete, click Save.
Any saved changes to the price list will automatically push changes to the product database.
Create Packages ![]()
Packages are groups of products and services. If you don’t sell packages, there’s no need to create them in the system.
System Settings > Catalogs > Package Builder.
Once the price list is created and all individual items are added to the product database, packages can help your families select the products and services that are most appropriate.
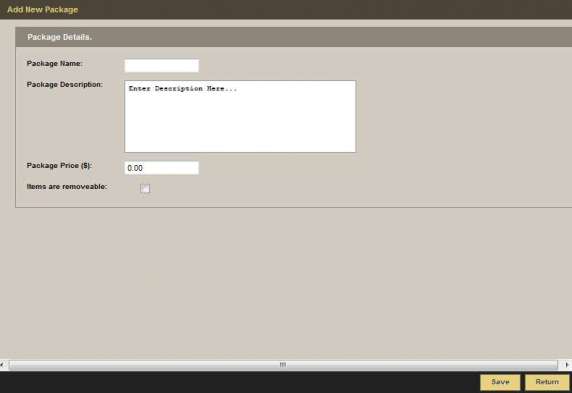
Select the button. Enter the package properties:
- Package name
- Package description
- Package price
- Select whether individual items can be removed once a package is chosen.
- Save.
Once a package is created, check the items to be included.
Save Package. To edit a package, select the Package Name and Edit Package.
Contract Printing ![]()
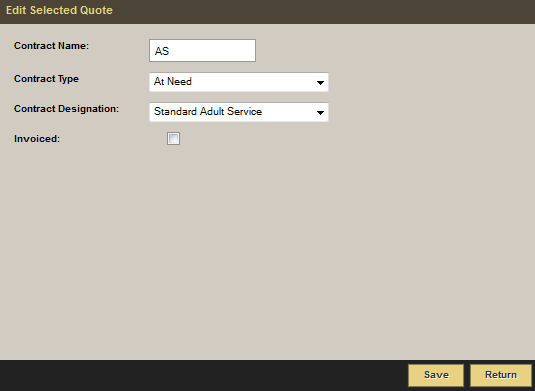
Open a Standard Mode record to create a contract. Select the Funeral Services Selector page on the left. If the record has no contract(s), a window will appear to enter information.
- Contract Name – Enter the name of the contract. ex: Last name of deceased.
- Contract Type – Select either At-Need or Pre-Need.
- Contract Designation – Select the contract designation.
- Invoice – Check the box if the family was invoiced.
- Save.
Navigate to Contract Options where a dropdown will appear: 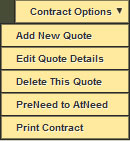
- Add New Quote – Add more than one contract for the record.
- Edit Quote Details – Returns to the initial properties window (shown above).
- Delete This Quote
- PreNeed to AtNeed – Convert from a Pre-Need to an At-Need contract.
- Print Contract
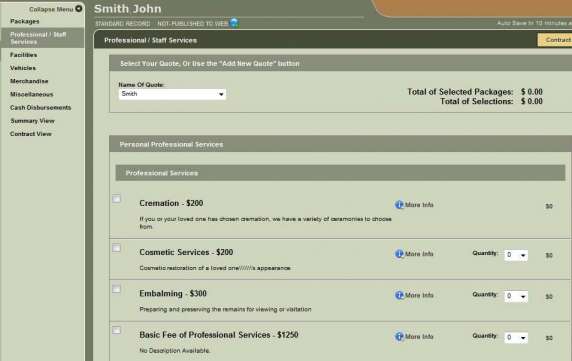
Services & Merchandise
Select the services and merchandise chosen by the family. By default, the Packages section will open. If a package has been purchased, select it from the list. If you do not offer packages, add individual products and services from the list in the second column.
Check products or services; the total price will populate at the top right. Click the More Info button to display more information about the product in a separate window. Some merchandise may include customization options, which can be added in this window. If a product or service is not listed, it needs to be added. Select Create New Product and enter the product or service information. Preview the contract through the Summary View page, which can be shown to the family.
If prices of any selection need to be modified, Edit This Quote. Click any of the white fields to edit the price.

Click Update Quote to save the information. Navigate to the Contract View page to preview the printable layout. 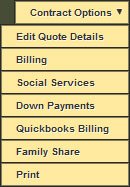
Each contract has final billing options. Navigate to Contract Options:
- Edit Quote Details – Edit the contract details.
![]()
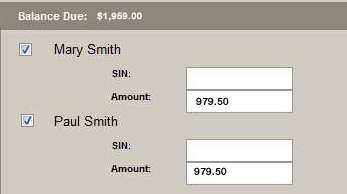
- Billing – Select the family members who will take care of the final bill. Select who will be added to the contract from the names previously entered in the family relationships section. The balance due may be equally split or as requested. To add a new family member, click the ‘Add Family’ button at the bottom right, which will display the same screen as the family relationships page.
- Social Services – Add social services.
- Down Payments – Add the amount already paid by the family.
- Quickbooks Billing – Export the contract information into Quickbooks (if app available within your system).
Family Share – Select individual items and create separate contracts for each family member who wishes to pay for specific items.
- Select the family member.
- Check the applicable products / services.
- Once a product is selected, a pop-up window will appear to create a separate contract for a specific family member.
- This step can be repeated for all family members until all items on the contract have been selected.
Print – Select the Print option to print out the contract for the family to sign. The system will generate a PDF of the contract which can be printed on legal sized paper (8.5×14). If multiple contracts have been created, select which contract to print.
Need more help with this?
Don’t hesitate to contact us here.